

MSPs
Creating an MSP
Updated: November 16, 2026
Provision a new MSP workspace with its own branded portal, products, and plans.
Each MSP you create gets its own isolated workspace and a branded portal domain from which it manages its own clients.
Create the MSP
- Open the MSPs page from the sidebar.
- Click Create MSP.
- Fill in the form:
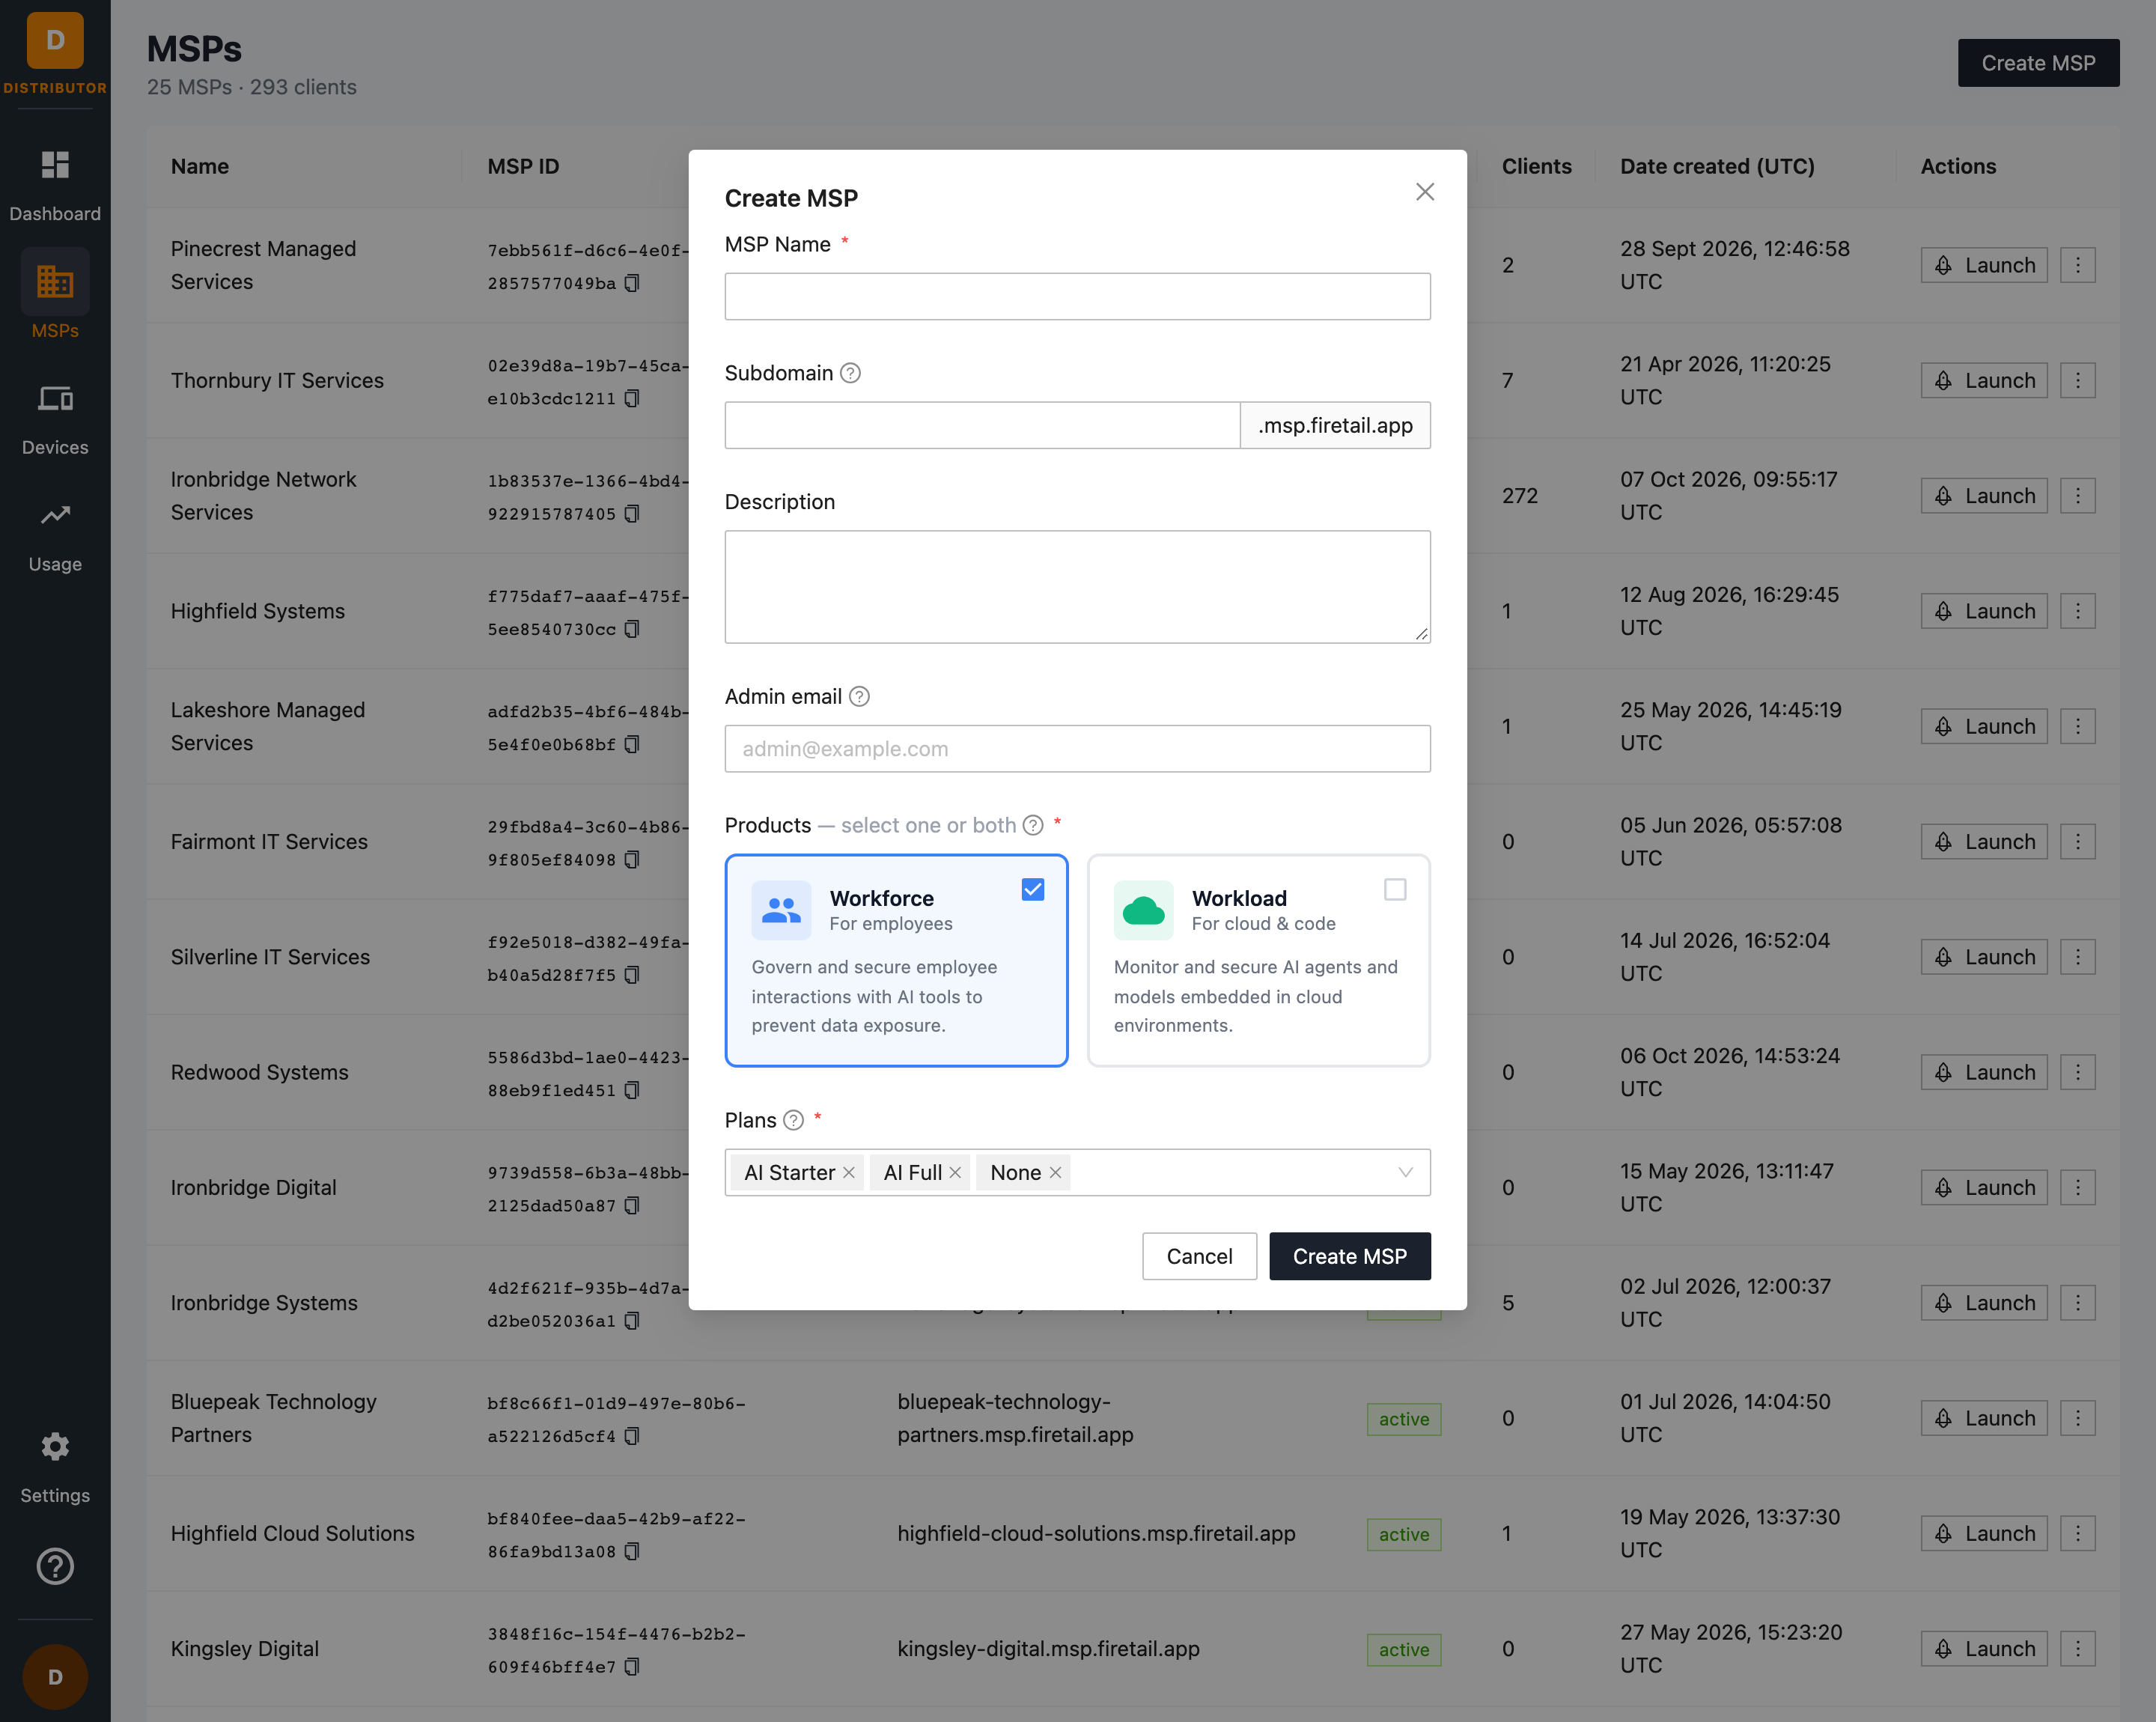
| Field | Description |
|---|---|
| MSP Name (required) | The display name of the MSP. |
| Subdomain | The MSP portal subdomain (for example acme → acme.msp.firetail.app). The form shows the full domain suffix and checks that the subdomain is available. |
| Description | Optional free-text notes about the MSP. |
| Admin email | The first admin user of the new MSP. They will be able to sign in to the MSP's own portal straight away. |
| Products (required) | The products this MSP can assign to its clients. Select one or both (see below). |
| Plans (required) | The plans this MSP can assign to its clients. Select one or more of the plans available to your distributorship. |
- Click Create MSP. The new MSP appears in the list with an active status and its portal domain ready to use.
Products
| Product | Audience | What it does |
|---|---|---|
| Workforce | For employees | Govern and secure employee interactions with AI tools to prevent data exposure. |
| Workload | For cloud & code | Monitor and secure AI agents and models embedded in cloud environments. |
You can select one or both. Products and plans can be changed later — see Managing MSPs.